환경 구성
| hostname | ip | os | 역할 |
| server01 | 192.168.56.101 | CentOS 7 HA-Proxy version <1.5.18 2016/05/10> |
haproxy |
| server02 | 192.168.56.102 | CentOS 7 | web ui 1 |
| server03 | 192.168.56.103 | CentOS 7 | web ui 2 |
환경 설정 [server 01 ~ server03에서 작업]
1. 방화벽 해제
systemctl stop firewalld ; systemctl disable firewalld
2. selinux 비활성화
setenforce 0
sed -i 's/^SELINUX=enforcing$/SELINUX=permissive/' /etc/selinux/config
HTTP WEB UI [server 02 ~ server03에서 작업]
server02와 server03에서 http daemon을 사용해 web ui를 생성한다.
1. httpd 설치 및 시작
yum install -y httpd

systemctl start httpd ; systemctl enable httpd
2. index.html 작성
/var/www/html/ 경로에 index.html 문서를 생성한다.
vi /var/www/html/index.html
<server02 index.html>
<h1>
  server02 http ui
<h1>
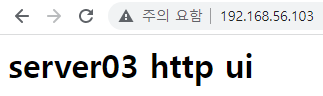
<server03 index.html>
<h1>
  server02 http ui
<h1>
browser에서 server02, server03 ip로 접근 시 아래와 같은 text가 출력된다.

HAPROXY 설정 [server01에서 작업]
1. haproxy 설치
yum install -y haproxy
2. haproxy.cfg 수정
vi /etc/haproxy/haproxy.cfg
:set nu로 line number 확인하고 아래와 같이 수정한다.
63 line : haproxy port 설정 (5000이면 haproxy_ip:5000으로 접근)
81 line : load balancing을 roundrobin 방식으로 적용
82, 83 line : servero02, servero3 ip와 port를 입력
63 frontend  main *:5000

 80 backend app
     81     balance     roundrobin
     82     server  app1 192.168.56.102:80 check
     83     server  app2 192.168.56.103:80 check
3. haproxy 시작
systemctl start haproxy ; systemctl enable haproxy
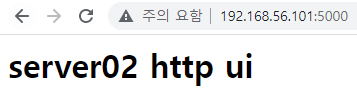
HAPROXY 적용 확인
haproxy_ip:port로 접속한다.
balance가 roundrobin이라 접속할 때마다 server02와 server03의 page를 번갈아 가면서 보여준다.

'etc' 카테고리의 다른 글
| mariadb data retention (0) | 2023.07.29 |
|---|---|
| kubeflow (0) | 2023.01.18 |
| centos playwright (0) | 2023.01.15 |
| CentOS 7 smtp 서버 구축 (0) | 2022.05.12 |
| iperf3로 네트워크 속도 측정 (0) | 2022.03.25 |
댓글